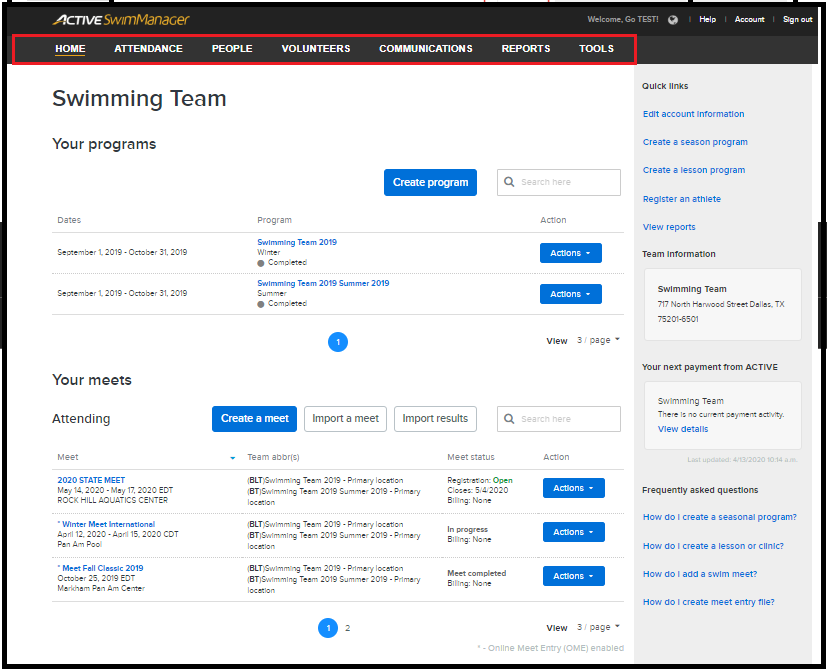
Users can navigate the Swim Manager homepage to organize their programs and swim meets. See below on how:
1. Homepage Tabs
2. Programs


- Note: New Feature Announcement will pop up when agency staff or coaches log in to Swim Manager when a new feature is available
1. Homepage Tabs
a. Click the menus on top of Homepage (as needed)
- Home
- Attendance
- People
- Volunteers
- Communication
- Reports
- Tools
2. Programs
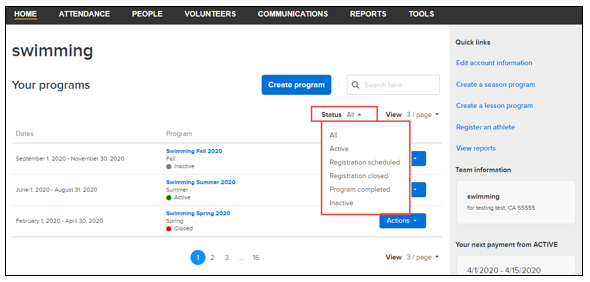
a. Select how many programs to display on page by clicking View > X / page
b. Filter programs by clicking the new Status filter and selecting one of the following statuses
- All (selected by default)
- Active
- Registration scheduled (for programs that are scheduled to open registrations)
- Registration closed
- Program completed
- Inactive
c. Click Action button to manage programs
Related articles:
- Setup Training Groups
- Copy Program in Swim Manager
- Deactivate a Program
- Archive or Unarchive an Inactive Program on Swim Manager
- Remove or Delete Program
3. Meets
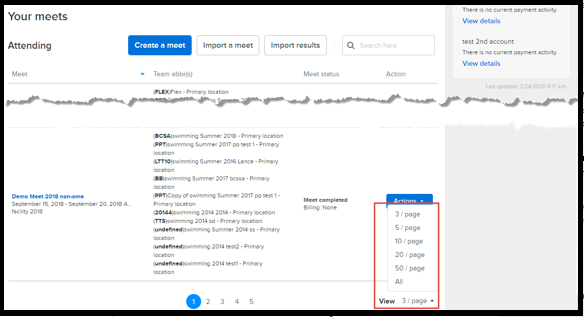
a. Select how many programs to display on the page by clicking View > X / page
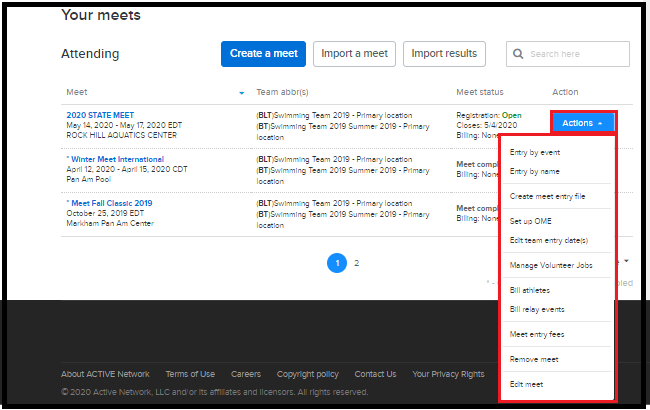
b. Click Action button to manage meet
- Note: See article Online Meet Entries for more detailed steps on how to navigate meets
4. Account setup
On the upper right corner, users will see the welcome message, Help center, Account settings, and Sign out button
5. Quick Access
- Quick links
- Team information
- Payment schedule
- Frequently asked questions


